-40%
Cupholder for 1984-1996 Jeep XJ Cherokee & MJ Comanche
$ 26.4
- Description
- Size Guide
Description
Don't like this design? Check this one out instead! https://www.ebay.com/itm/2552511738701984-1996 Jeep XJ Cherokee/Comanche cupholder for the FULL LENGTH center console only.
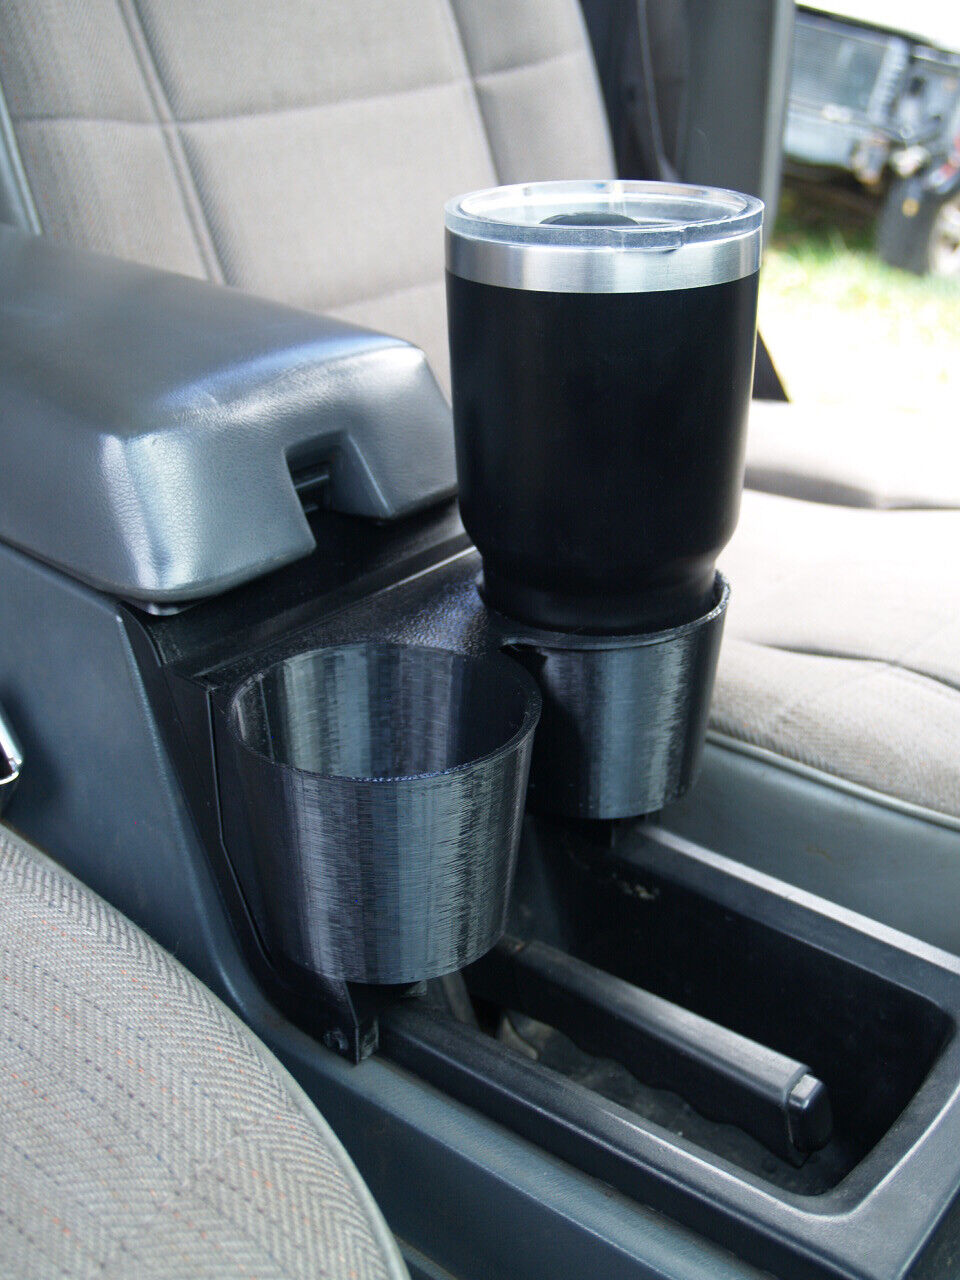
This is a 3D printed cupholder solution for the 84-96 XJ Cherokee and 86-92 MJ Comanche full size console. This attaches to the center console above the handbrake and is a two piece design to allow for easy handbrake operation. The two parts are a lower mount and a removable cupholder. It is designed to be as small as possible to allow access to the cubby hole underneath. This is designed to accept the 20oz and 30oz Yeti tumbler and has a recess in the bottom to keep cans centered and upright. Will also fit most large disposable cups.
This is the only cupholder available for the XJ and MJ that takes up minimal space while still accepting large cups as well as allowing for handbrake operation.
To operate the handbrake, simply lift the cupholder portion straight up and clear of the mount, then pull the handbrake. With the handbrake pulled, you can set the cupholder onto the handbrake or set in the seat if preferred. This works just the same if you don't have a handbrake, you can just leave it in place and only pull the cupholder out if you need to clean it.
In the package you will find the cupholder and mount with (2) L-brackets installed on the bottom of the mount. There is also (1) extra screw in the backside of the mount. The mount attaches using the factory screws under the console lid and has L-brackets that slide under the black console insert to hold the bottom in place. This wont damage your center console and does not require drilling any holes.
INSTALLATION - remove the large black console insert. Remove one L-bracket from the mount and slide the mount over the console insert and line up the upper holes. Reinsert the other L-bracket and tighten screw until it is JUST FLUSH with the raised portion of the mount, only use a hand screwdriver to prevent overtightening. Set console insert back into the console and insert upper screws, JUST GET THEM SNUG, don't overtighten. The upper screws should be just tight enough your console lid will latch. After the console insert is back in the console, just slide the cupholder portion straight down into the mount.
***DISCLAIMER***
- These are printed in black PETG plastic. This plastic can start to get soft at temperatures of 190*F. Even in extreme environments this shouldn't be an issue. PETG parts have been used in vehicles for long periods of time without Ill effects.
- This is a 3D printed part, this means not all parts will appear or fit exactly the same. It is set to print as fast as possible due to the long print times and I'm trying to keep prices low, this results in a slightly lower resolution print however I will never send a part out that doesn't look good or function properly. I do not accept returns due to it being made to order, however If you have an issue with your part, please contact me and we can work out the issue together.
- If you break it due to over-tightening a screw or through use, you can fix it with some super glue or you can message me to purchase a replacement part. Over-tightening screws should be a non-issue, I was only able to break it using a drill so stick with a hand screwdriver.
- This is a made to order part and takes 2 full days to print if all goes well. I print and ship as soon as possible but due to the long print time, please allow for 1-2 weeks for me to process and ship.
- Shipping damage must be reported within 3 days of receiving the item. After this time a return/refund will not be accepted nor will a replacement part be sent out due to shipping damage.


